What every hairstyling professional should know about shears
Table of Contents
- Price Difference
- Quality of Steel
- Titanium Shears
- Cast vs. Forged
- Quality of Workmanship
- Types of Blades
Know Your Tools!
Professional hair cutting scissors can be expensive, $1,000 is not unheard of in the industry. That’s why, if you want to spend your money wisely, you need to choose a good pair which will last a long time. Given the number of choices out there, that’s not an easy task. Starting with a few basics, hopefully we can help you with your search.
Why is there such a price difference in shears?
Quality of materials and craftsmanship.
The steel used in the manufacturing of your shears is largely responsible for the price that you pay. The quality of the steel in your shears also dictates how long your shears will perform well without needing to be serviced. The bottom line is that you may pay a higher price up front, but you will save time and money later.
Quality of Steel
The steel grades from highest to lowest are as follows:
- Hitachi ATS 314
- Hitachi 440C
- V10 (VG10)
- V1 (VG1)
- 440C
- 440A
Traditionally, Japanese Hitachi Steel is known to be the ultimate manufacturer for producing superior cutting tools. However, in recent times, some companies print “Japan”or “Hitachi Steel” on their shears with intention to deceive.
Remember, you get what you pay for. There are many cheap importers that will sell you a scissor for $30-$60, claiming that the product is “high quality”. These bargain basement scissors will last you one to three months before you permanently stick them in the drawer or throw them away. These shears are made of poor quality steel and many sharpeners can’t or refuse to service these at all. Don’t allow yourself to be conned. Scissors that are made from high-quality steel and embody excellent workmanship are going to cost anywhere from $250-$500. Make sure you buy from reputable companies and always ask questions. If you come across a brand that no one recognizes, buyer beware. If you are unhappy with the value you received, don’t hesitate to return the shear.
Titanium Coated Shears
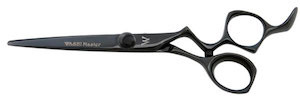 Titanium is used to apply unique colors to the steel surface of a scissor. This coating has no positive impact on the edge retention or overall performance of the shear since it is not on the edge of the shear. It is done for esthetic purposes to make the shear appear more attractive. Keep in mind, titanium coating does not last forever. Exposure to harsh chemicals without regular care and maintenance will certainly shorten its lifespan considerably.
Cast vs Forged Shears
Casting:
In this process, liquid metal is poured into a mold and then allowed to cool and harden into one piece. The one downside to casting, is that as the metal cools in the mold, it expands leaving the molecules more separated. This can allow the shears to become brittle and chip or nick more easily.
Forging:
During this process, the handle and the blades are made separately, often in different grades of steel. They are then welded together. A compression force is used to shape the metal pressing the molecules closer together. This process creates a longer lasting edge. It is virtually impossible to tell the two apart by sight. It would be a mistake to think that a “forged” or “cast” tag alone ensures that you are buying a better shear. Both types of scissors can be made poorly and end up in your drawer never to see the light of day. This is where the integrity and reputation of the company you are buying from comes into play again since there is no way of knowing exactly what it is that you are buying. You have better chances of buying quality product if you shop with a reputable company that has been around for many years.
Quality of Workmanship
When it comes to the craft of shear making, it goes hand in hand with the quality of steel. No manufacturer would want to waste expensive steel alloy by allowing inexperienced technicians do the finishing work. The quality of workmanship has a direct effect on the scissor’s performance. Therefore, it is one of the most important factors to consider when choosing your professional tool. Quality scissors are meticulously hand- finished by masters of the trade. Polishing and honing the blades of a shear to a razor-like sharpness is a skill that has become an art form. Less expensive shears are machine made and sharpened.
Types of Blades
There are three common types of blades that you may encounter during your search: the convex edge, the semi-convex edge, and the beveled edge. Convex Edge. Making this type of shear is a much more labor-intensive and extremely detailed process. It produces a much smoother and more precise cutting experience.
Convex
 Convex edge shears have a very sharp edge and require less force. These shears, however, do require a great deal of care. This powerful edge allows for more advanced cutting techniques.
Semi-Convex Edge

Semi-convex shears are a hybrid of the convex and beveled edge shears. It is a more narrow beveled edge, but it is not a true convex edge. Semi-convex shears are sharper than beveled edge shears and are very durable.
Beveled Edge

The beveled edge blade style is one of the oldest and least expensive designs. It can cut well, but requires more force than a convex blade. One of the main advantages of such an edge is the durability of the blade due to the thickness of the edge. A beveled edge shear can perform very well if made of very high quality materials. A significant drawback of this type of blade is that it is not suitable for more advanced cutting techniques such as slide cutting.
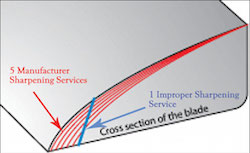 After investing in your professional tool, the last thing that you would want to do is to let any “off the street” sharpener ruin your prized possession. We recommend to always use a manufacturer’s service regardless of the brand of shear you buy. People may come to your salon claiming that they know how to sharpen or are authorized. There is no regulation when it comes to authorizing sharpeners and therefore just about anyone can make that claim. These “authorized sharpeners” may ruin your shears beyond repair. Don’t take a chance with your expensive tools! The manufacturer’s service can sharpen your shears five times and remove less metal than one improper service. Improper service will significantly reduce the longevity of your tool.
Shear Fitting
Proper Technique
How to choose the shear that will work best for you? Simply speaking, it has to fit “like a glove”! If you have a smaller hand, you will want to fit the finger holes with extra finger inserts. Larger hand - look for larger finger holes. No shear will be comfortable if you “fight” its design. Start by practicing the basic cutting technique: let your thumb control the moving blade while keeping the rest of your palm still and in line with your forearm. By doing so, you will allow the pressure to be generated from the pivot of the scissor, making the sharpness of the blades do the work.
Handle Designs
Straight or Opposing Handle

This style works well for stylists that cut with the middle finger and thumb. This is the oldest and least ergonomic handle design because it elevates the elbow causing faster fatigue. (Not recommended.)
Offset Handle

The is one of the more popular designs on the market. The shorter thumb handle reduces overextension of the thumb and creates a more open hand.
Crane-Style Handle

Proven to be the most ergonomic handle. The extreme offset drops the elbow position relieving the stress on both the shoulder and wrist for stylists.
Shear Thumb Handle Designs
Your thumb is doing a lot of the heavy lifting during a cut, therefore a lot of research has gone into the designs to enhance comfort and reduce the stress on your thumb. Some of the thumb ring designs that you will come across on the market today are the standard flat thumb, the cut-away thumb, the bent or anatomic thumb, and a swivel thumb. For greater comfort, look for a cut-away, bent or anatomic, or the swivel thumb. These accommodate a more natural angled position for your thumb. The standard flat thumb ring is one of the oldest styles and is the least comfortable. However, sometimes lefties prefer this style because they can easily use it.
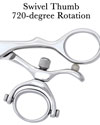
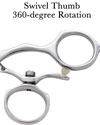 With a regular shear, your thumb is in a vertical position and the wrist is arched. With a swivel, your thumb will be in its natural position just as if you are about to shake hands. It creates a horizontal cutting action that allows complete control of your styling technique without fatiguing or stressing your hand. This style handle is recommended by medical professionals dealing with hand stress injuries.
Shear Length
The length of a shear is measured in inches from the tip of the shear, to the edge of the finger hole (excluding the finger rest). A standard cutting shear is typically about 5.5 inches. The right length should be determined not only by the size of your hand, but more importantly, by your cutting technique. A short scissor, for example, is a much better tool for detail work, while a longer scissor requires fewer cuts to connect a line.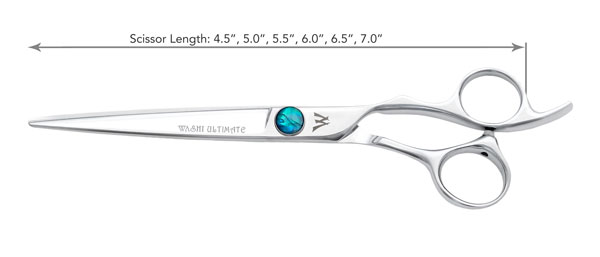
Shear Knowledge
What should you have in your toolbelt?
On average, a professional stylist will have 5 or more high quality tools at their fingertips. Here are just a few of the must have tools in your arsenal:
- Main: This shear is typically 5.5 or 6.0 inches in length and is the go-to scissor for most of your work.
- Thinner: This shear can vary from 27 to 40 teeth and is used for blending and removing lines.
- Texturizer: Varying from 10 to 24 teeth, a texturizing shear is used for removing weight and creating volume.
- Long shear: This shear is usually 6.0-7.0 inches long and is used for specialized cutting techniques such as scissor-over-comb, deep point-cutting, and heavy-duty blunt cutting.
- Narrow blades: This shear is usually 5.0-5.5 inches long with narrower blades for intricate detail work.
- Backup tool: This tool should be as good as your main cutting tool. A proper backup is a must when you send in your go-to shear in for service.
Thinning vs. Texture Shears
These shears typically have 10 to 24 wide and further distanced teeth. The wider teeth cut more hair, making this type of tool perfect for bangs and wisping. The cut section of hair will be visible compared to the uncut section. A texture shear is used to remove the bulk and create more lift and movement. The underlying cut sections of hair will support the uncut hair. The more aggressive texture shears can have anywhere from 5 to 9 teeth. These tools cut a more significant gap into hair sections creating a more obvious texture between the cut and uncut hair.
These are the best tools for blending away scissor marks in the hair. The thinner teeth remove less hair with each cut allowing these shears to remove weight without increasing volume. Unlike the texture shear, there will be no visible difference between the cut and uncut sections of hair. Thinning shears are often used to create feathering and a more soft finish. As with any other shear, it is very important to use thumb-only action when using these specialized tools. Squeezing the blades together can cause a tooth to catch on the cutting blade, making it impossible to close the shear and damaging both blades, taking years off the life of your tool.
Left-Handed Shears
Most stylists who have been cutting with right handed shears in their left hand may have problems switching their cutting style to accommodate a true left- handed shear. Normally a stylist who has been cutting left-handed using right- handed shears, has to apply pressure to the handle to make the blades close. If the same pressure is applied to the true left-handed scissor, the blades will pull apart and the hair will fold over the blade. Using proper cutting technique and correct vertical thumb action will allow the scissor to work perfectly. In order to get the true left-handed shear to work for you, you need to be patient and give it some time.
Maintenance
- Wipe shears after every use and clean them at the end of each day. Chemicals can dull your blades, while hair and dirt left on your shears can cause rusting and pitting.
- Oil shears daily in the screw area.
- Check tension daily and adjust as needed. (If the shear bends hair it usually means that the shear is too loose. New shears will need adjustment after the first few cuts as the screws and washers set in place.)
- Keep blades closed when not in use or when setting the shear down. An open shear exposes the fragile edges to nicks or bends.
- Only cut hair. Any other material can bend or nick the edges.
- Store shears in a case.
- Check edges for nicks by gently running the tip of your finger nail along the blades.
- Service when needed.
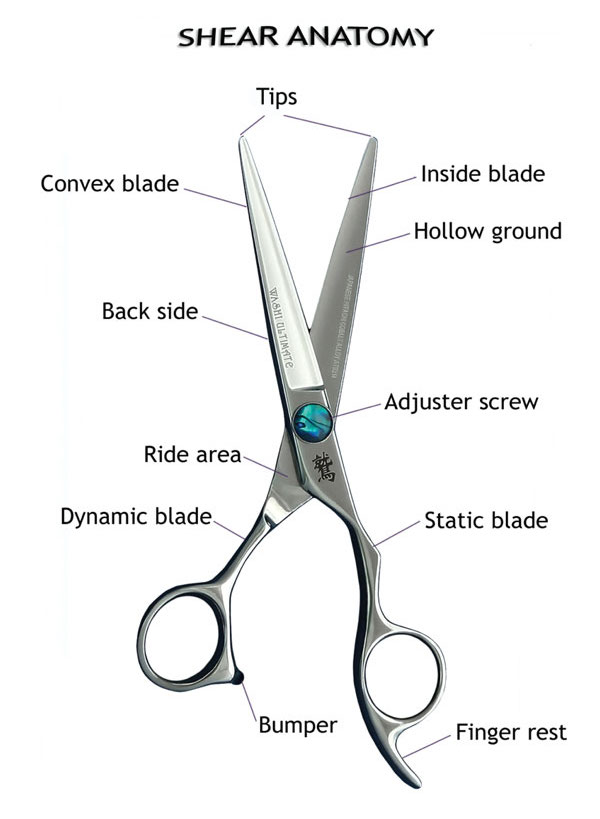
Shear Anatomy
